xmake开发stm32方案 xmake开发stm32分为两个部分,一个是LSP和编译,一个是烧录和调试。
假定已经下载好一个vscode了,如果没有的话,在https://code.visualstudio.com/ 安装一个。
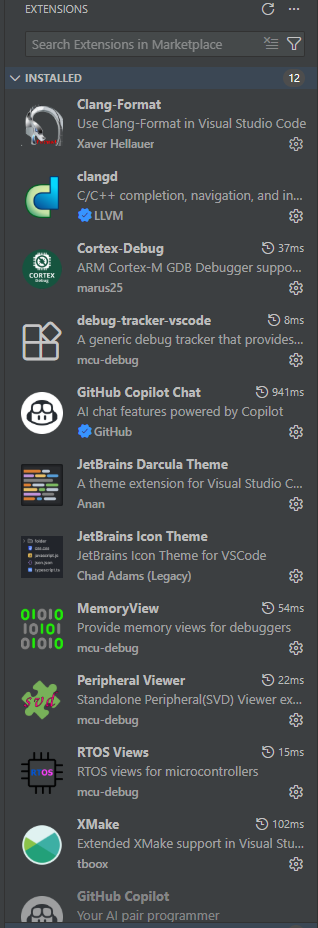
下面是我的所有vscode插件的截图,可以直接按照这个一口气装好,也可以按照后面教程一个一个装。
必备插件清单:
Clang-Format:代码格式化工具。clangd:提供极其强大的代码补全、语法检查和跳转功能(LSP)。Cortex-Debug:用于嵌入式调试的核心插件。xmake:提供 Xmake 的图形化配置支持。
LSP和编译 LSP,也就是提供补全和高亮的,这里我的方案是clangd。而构建工具选择xmake,编译器选择gcc。格式化选的是Clang-Format。
先介绍一下需要安装的vscode插件,有Clang-Format、clangd、xmake。
clangd 这个无需额外安装,在clangd这个插件安装完成以后,vscode会提示你缺少clangd,然后有个install按钮,你按了以后等待安装完成即可。
xmake xmake的安装很简单,我只教在windows上最简单的方法,其他方法参考https://xmake.io/zh/guide/quick-start.html 。
需要先在windows的搜索里面搜索PowerShell,然后打开。然后复制粘贴下面这个内容,回车,然后等结束。
1 irm https://xmake.io/psget.text | iex
gcc 安装-10.3-2021.10-win32.exe这个,并且记住自己安装的路径。这个文件也可以在https://developer.arm.com/downloads/-/gnu-rm 官网下载。
把这个添加到系统环境变量的Path,添加进去的目录是C:\Program Files\GNU Arm Embedded Toolchain\10 2021.10类似于这样子的。添加环境变量的教程参考https://www.cnblogs.com/wutou/p/17890768.html 。
烧录和调试 烧录和调试需要OpenOCD加上Cortex-Debug插件。
openocd 可以在https://openocd.org/ 下载最新版,安装即可。
Cortex-Debug插件配置 左键这个插件的齿轮,点击Setting。然后找到Cortex-debug: Arm Toolchain Path,点击Edit in setting.json。
在这个文件里面找到"cortex-debug.armToolchainPath"这部分,然后添加下面这样子的内容。
1
2
3
"cortex-debug.liveWatchRefreshRate" : 100 , "cortex-debug.armToolchainPath" : "C:/Program Files/GNU Arm Embedded Toolchain/10 2021.10/bin" , "cortex-debug.openocdPath" : "C:/Program Files/OpenOCD/bin/openocd.exe" ,
launch.json的配置 在vscode左边栏的Run and Debug页面,点击Add Configuation,然后就会自己创建一个launch.json,这个文件按照下面这样子写。每次新的调试需要改的地方就是"executable",还有就是"configFiles",这个根据项目的MCU和项目名字不同略微调整。
1
2
3
4
5
6
7
8
9
10
11
12
13
14
15
16
17
18
19
20
21
22
23
24
25
26
27
{ "version" : "0.2.0" , "configurations" : [ { "cwd" : "${workspaceRoot}" , "executable" : "./build/cross/arm/debug/test_prj.elf" , "name" : "Debug with OpenOCD" , "request" : "launch" , "type" : "cortex-debug" , "interface" : "swd" , "configFiles" : [ "interface/cmsis-dap.cfg" , "target/stm32f4x.cfg" ] , "servertype" : "openocd" , "searchDir" : [ ] , "runToEntryPoint" : "main" , "showDevDebugOutput" : "raw" } ] }
xmake构建stm32项目介绍 首先我们需要先用STM32CubeMX(版本要比较新)生成一个CMake和GCC的项目。在STM32CubeMX的Project Manager项目下的ToolChain / IDE选择CMake,然后再在Default Compiler/Linker里面选择GCC。这样子生成出来才有我们需要的链接器脚本。
这个脚本我做了一些精简,大致简单介绍一些结构性的东西。
第9行的"plugin.compile_commands.autoupdate"这个的目的是为了让clangd可以提供语法高亮和补全。
add_defines可以让我们定义一些宏,比如STM32F429xx就是是必须的。add_cflags这个是C语言的一些选项调整。
1 2 3 4 5 6 7 8 9 10 11 12 13 14 15 16 17 18 19 20 21 22 23 24 25 26 27 28 29 30 31 32 33 34 35 36 37 38 39 40 41 42 43 44 45 46 47 48 49 50 51 52 53 54 55 56 57 58 59 60 61 62 63 64 65 66 67 68 69 70 71 72 73 set_project("2026robot" ) set_version("0.1" ) set_xmakever("3.0.0" ) set_languages("c11" ) set_languages("cxx17" ) add_rules("mode.debug" , "mode.release" ) add_rules("plugin.compile_commands.autoupdate" , {outputdir = "." }) includes("stm32_toolchain.lua" ) target("2026robot" ) set_kind("binary" ) set_toolchains("arm-none-eabi-custom" ) set_filename("2026robot" ) add_defines("STM32F429xx" ) add_rules("stm32.convert_bin_hex" ) add_rules("stm32.f4xx.cmsis" , {device = "stm32f429xx" , toolchain = "gcc" }) add_rules("stm32.f4xx.hal" ) add_rules("stm32.f4xx.hal.freertos" ) add_files("Core/Src/*.c" ) add_includedirs("Core/Inc" ) add_files("src/**.c" ) add_cflags( "-mcpu=cortex-m4" , "-mthumb" , "-mfpu=fpv4-sp-d16" , "-mfloat-abi=softfp" , "-std=c11" , "-Wall" , "-fdata-sections" , "-ffunction-sections" , {force = true } ) add_asflags( "-mcpu=cortex-m4" , "-mthumb" , {force = true } ) add_ldflags( "-mcpu=cortex-m4" , "-mthumb" , "-mfpu=fpv4-sp-d16" , "-mfloat-abi=softfp" , "-Wl,--gc-sections" , "-Wl,-Map=2026robot.map" , "-TSTM32F429XX_FLASH_gcc10.ld" , {linker = true , force = true } )
工具链的定义在stm32_toolchain.lua这个文件里面,主要是定义了arm-none-eabi-custom工具链。
1 2 3 4 5 6 7 8 9 10 11 12 toolchain("arm-none-eabi-custom" ) set_kind("standalone" ) set_toolset("cc" , "arm-none-eabi-gcc" ) set_toolset("cxx" , "arm-none-eabi-g++" ) set_toolset("as" , "arm-none-eabi-gcc" ) set_toolset("ld" , "arm-none-eabi-gcc" ) set_toolset("ar" , "arm-none-eabi-ar" ) set_toolset("objcopy" , "arm-none-eabi-objcopy" ) set_toolset("size" , "arm-none-eabi-size" ) toolchain_end()